Table Chart: Working with Your Floor Layout
Written By Edith Henry
Last updated 25 days ago
The Table Chart allows you to create a visual representation of your event space so you can assign guests to tables with confidence. During your initial setup, you'll create a basic room layout, then return to update it as your seating plan evolves.
Creating Your Initial Table Chart
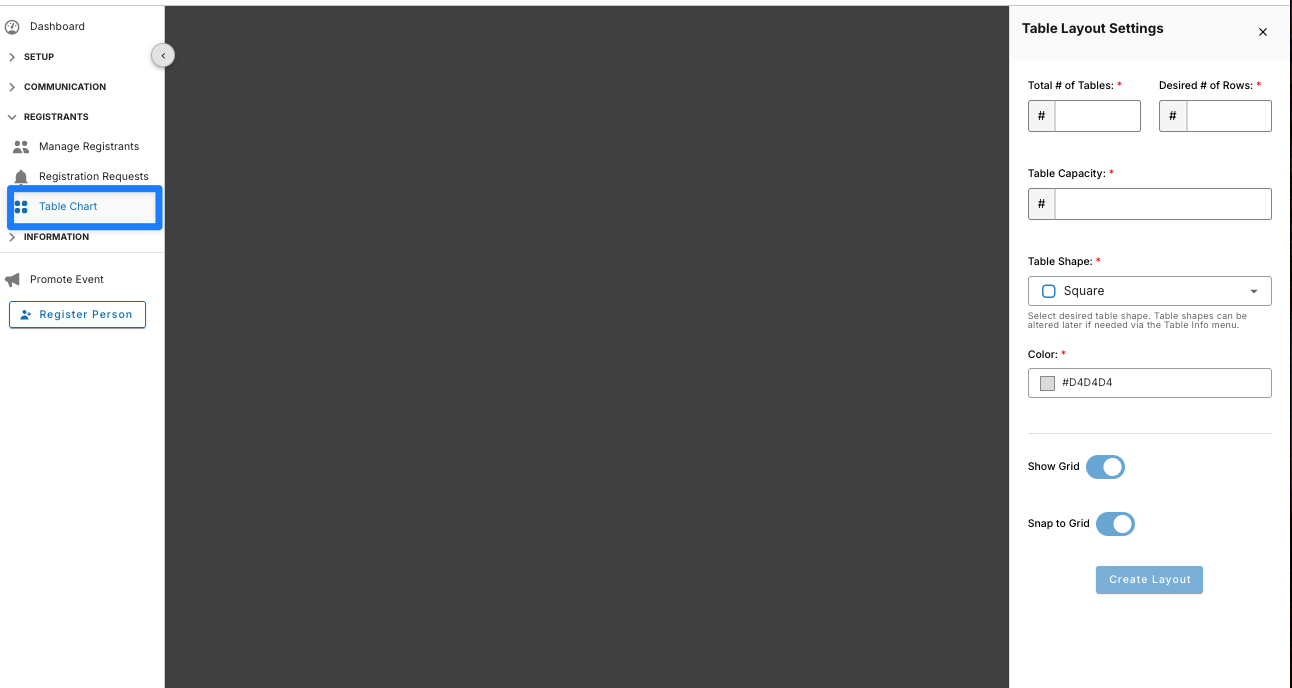
The first time you open the Table Chart, you'll be prompted to create your room layout by providing a few basic details about your event.
You'll be asked to specify:
Total anticipated number of tables
Desired number of rows
Seating capacity for each table
Table shape
Table color
Whether to display the table grid
These settings are used to automatically generate your initial floor layout.
Tip: Don't worry about making every detail perfect during this first step. Individual tables can be customized later, so it's best to choose settings that match the majority of your tables. This saves time by creating a layout that's already close to your final room setup.
After your initial table chart has been created, some setup values—including total number of tables, desired number of rows, and default table capacity—can no longer be updated in bulk. Because your layout may already include customized tables, any changes to these settings must be made by editing or adding individual tables within the Table Chart.
Editing Your Table Chart
You can return to your floor layout at any time by selecting Edit Table Chart in the bottom-right corner of the Seating Dashboard.
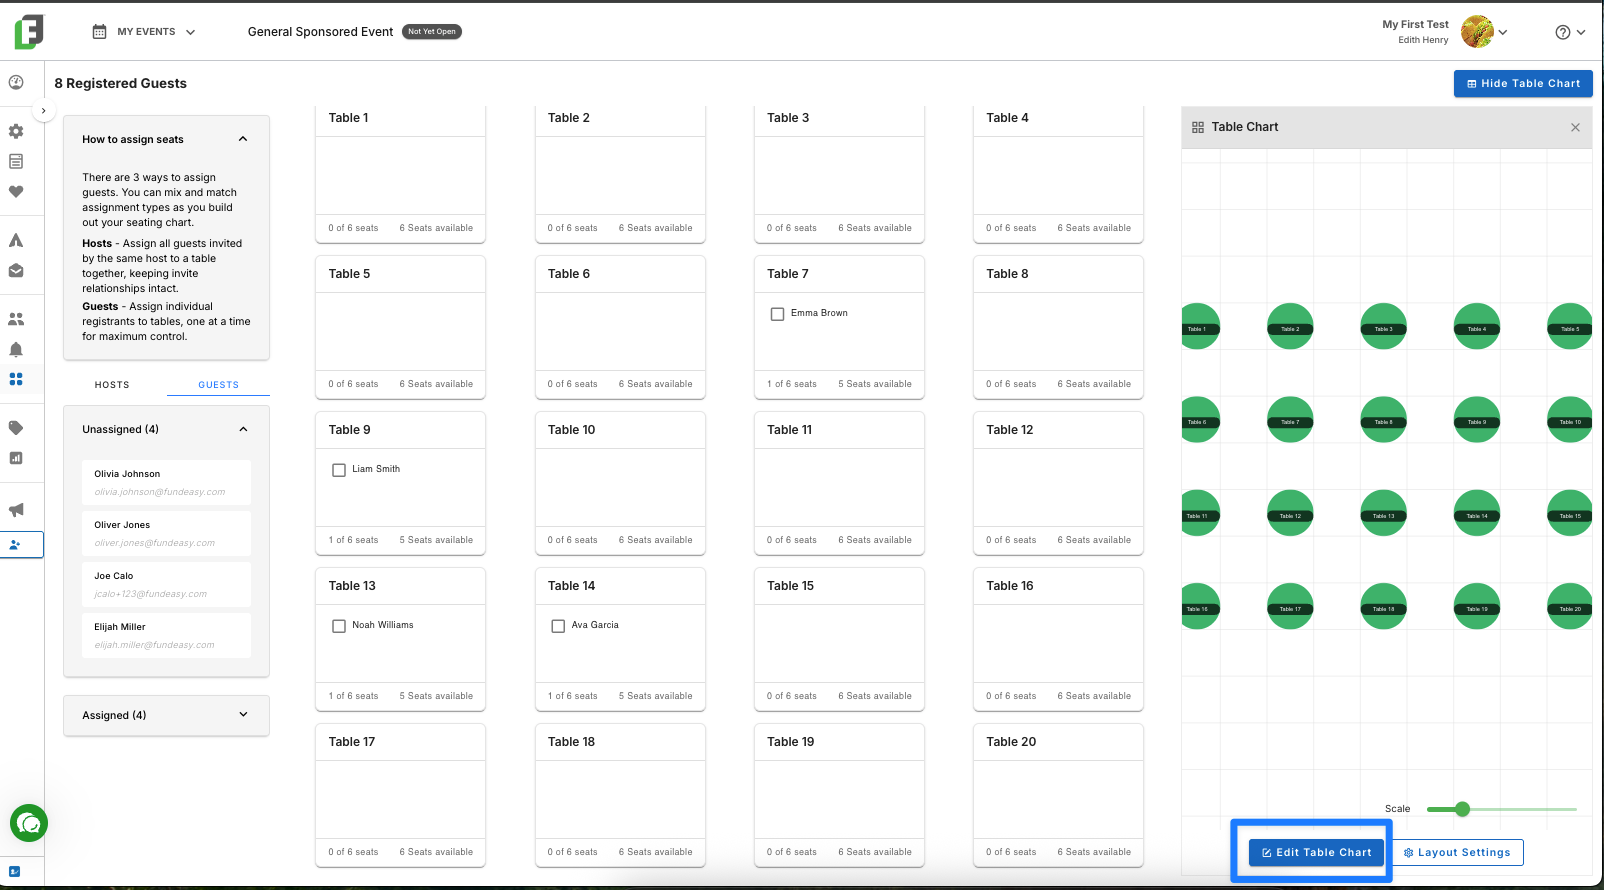
This opens a full-screen workspace where you can modify your room layout, add objects, and adjust the placement of tables and other elements.
Available Layout Tools
The toolbar provides several tools to help you build and organize your room:
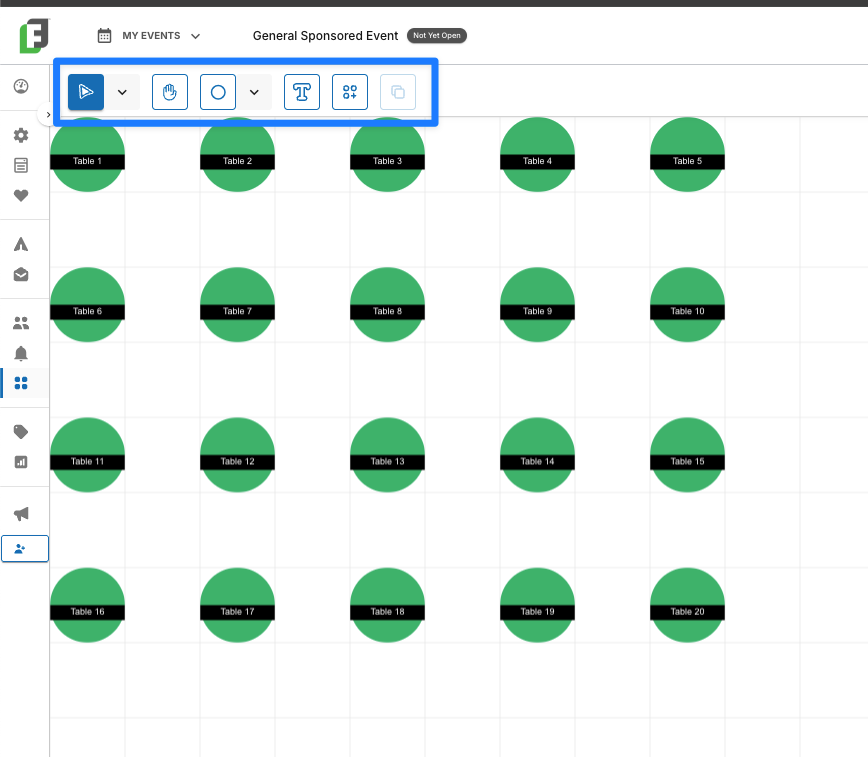
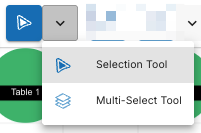
Selection Tool – Select and move tables or other objects.
Hand Tool – Pan around the canvas without selecting objects.

Shape Tool – Add shapes to represent non-table room features such as a stage, buffet tables, registration area, or other items in your venue.
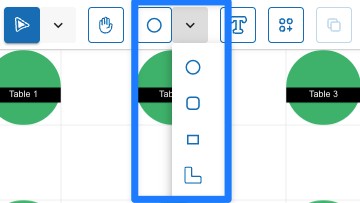
Label Tool – Add free-standing text labels anywhere on the layout. Double-click a label to edit or delete it.

Add Table Tool – Create additional tables and configure their settings before placing them on the canvas.

Duplicate Tool – Quickly create a copy of a selected table or object.

When you're finished updating your layout, select Return to Tables & Seating in the upper-right corner to return to the Seating Dashboard and continue assigning guests.
Customizing Individual Tables (Label, Color, Shape, or Capacity)
While the Table Chart tools allow you to edit your overall room layout, you can also customize each table individually. Using the Selection Tool, click the table you'd like to edit. A settings panel will open on the right side of the screen, where you can update the table's label, shape, color, or capacity.
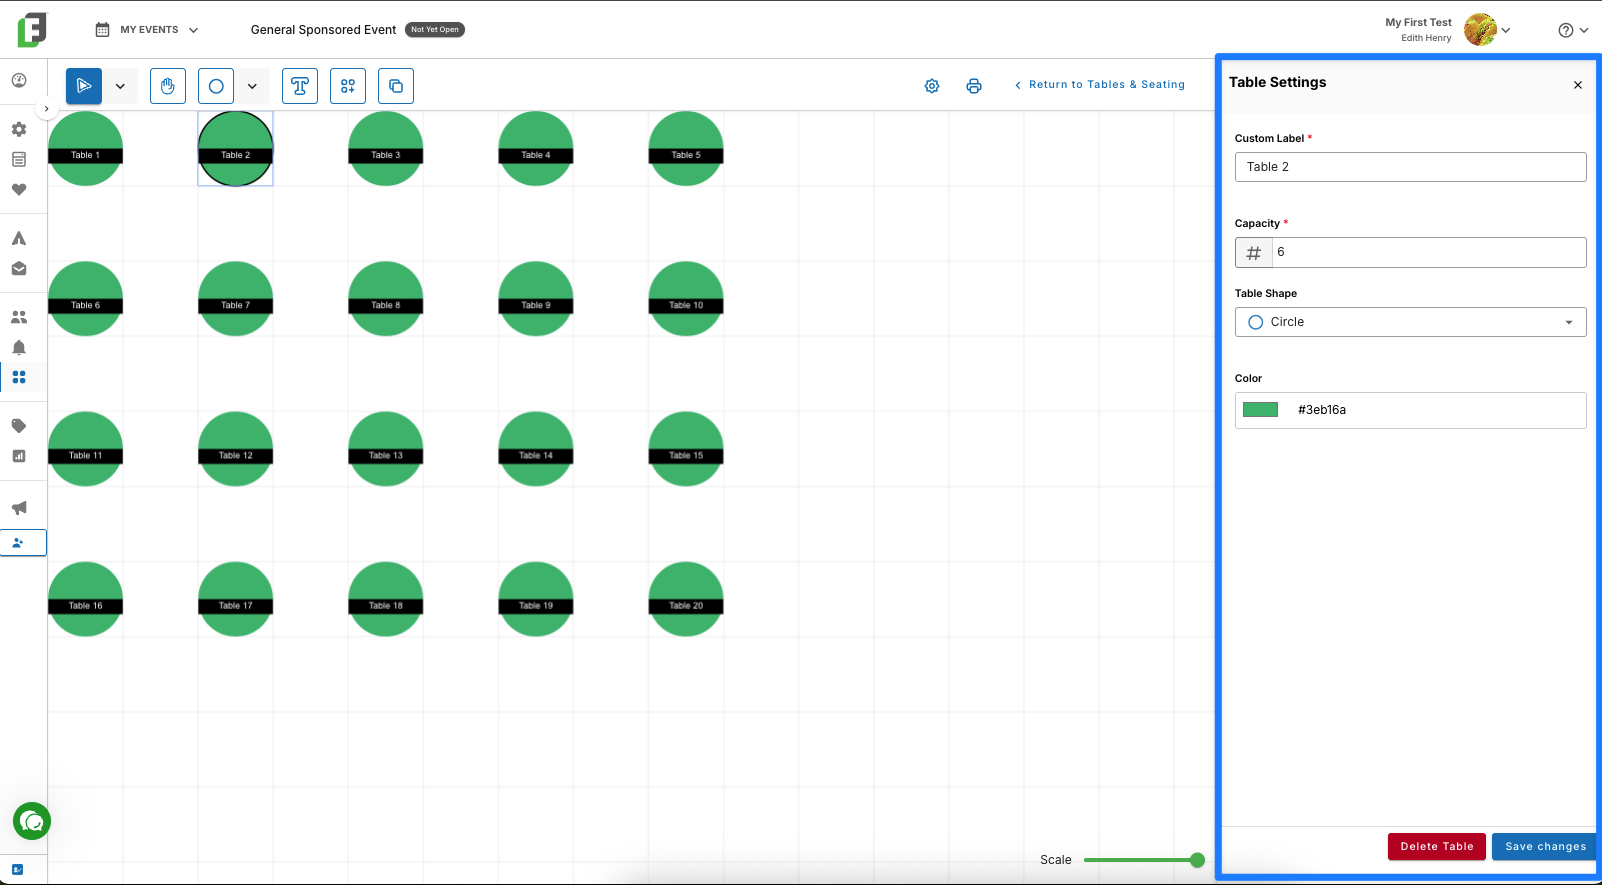
This makes it easy to create VIP tables, sponsor tables, head tables, or other seating arrangements that differ from the rest of your room.
Printing Your Table Chart
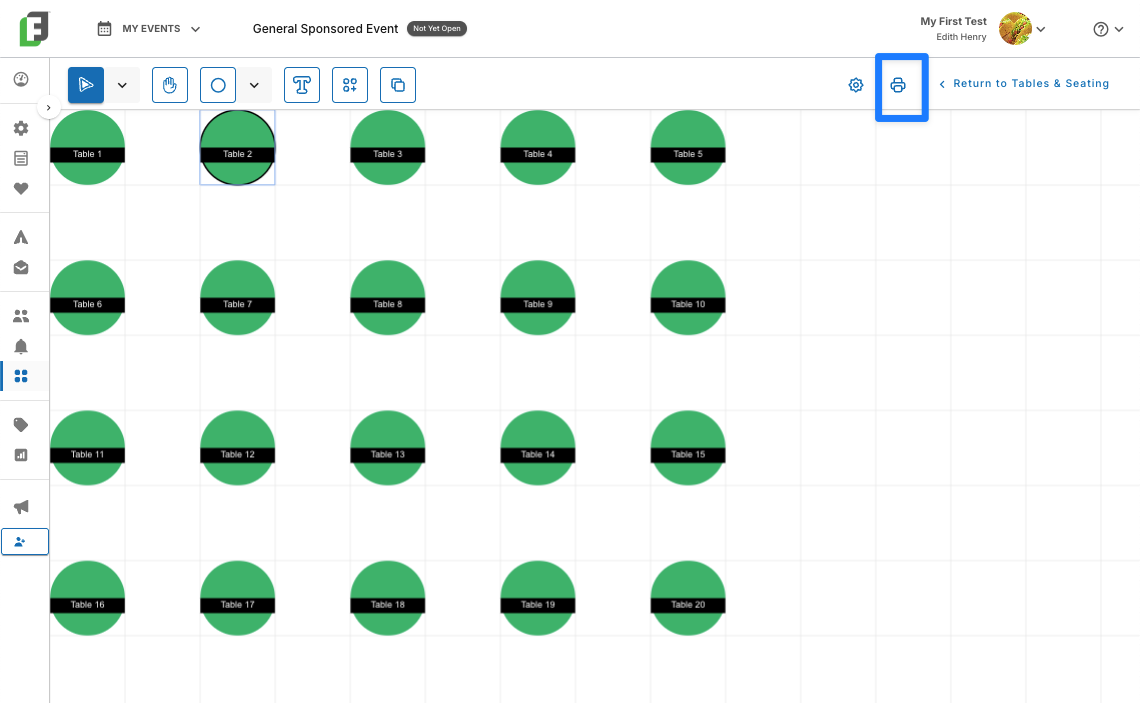
If you wish to print a physical copy of your room layout, you can do that from your fullscreen Table Chart workspace (click Edit Table Chart in the lower righthand corner). Simply click the printer icon in the upper right of your screen to enter the print workflow. You can specify whether you want to display Table Labels and Table Capacities, or whether you prefer to leave those hidden.
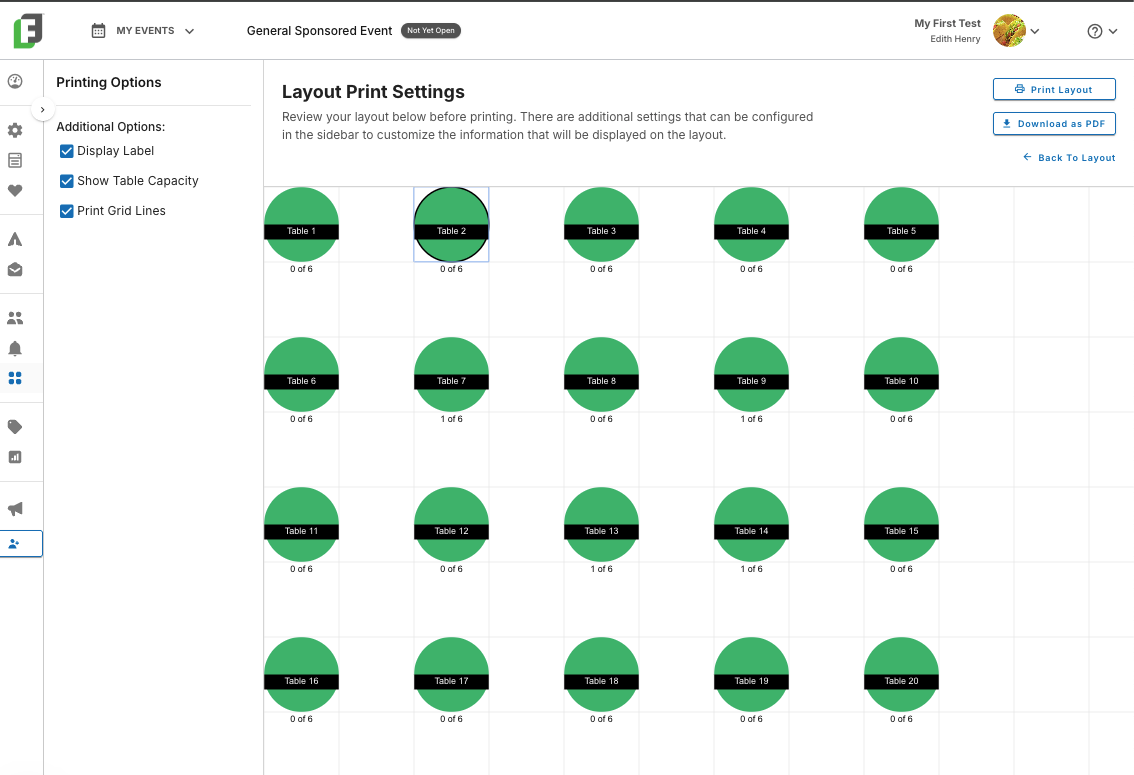
This allows you to print either a simplified room layout or a more detailed seating reference.
Resetting Your Table Chart
If your room layout changes significantly, you can completely reset the table chart and create a new layout from scratch.
To reset your table chart:
Open Layout Settings.
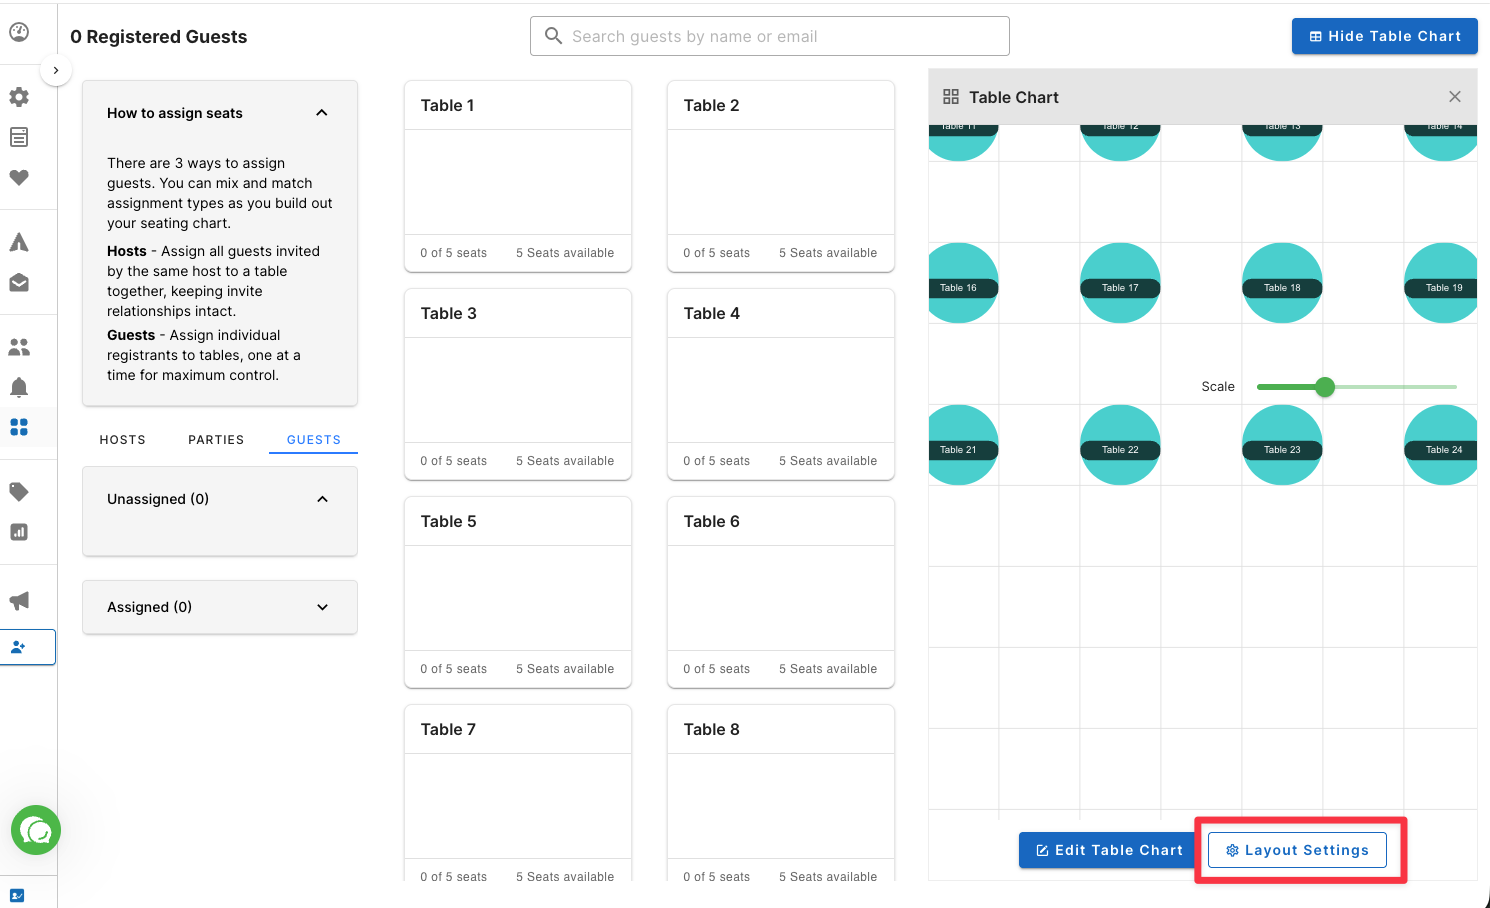
Scroll to the bottom of the settings panel.
Select Reset Table Chart.
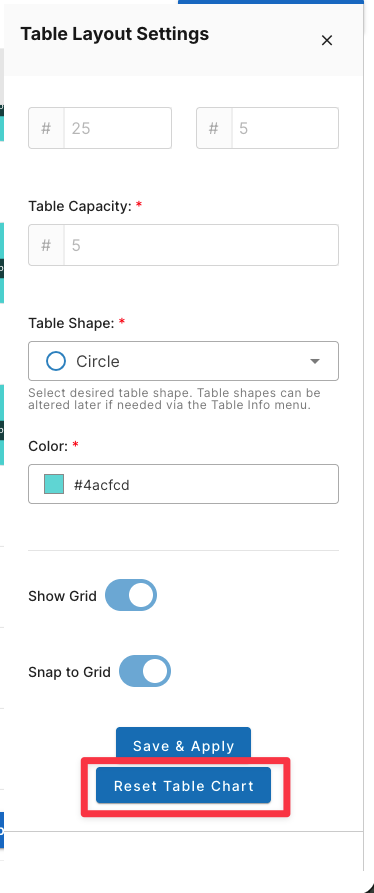
This removes your existing room layout and allows you to create a new layout using the initial setup process.
Important: Resetting your table chart permanently removes all existing table assignments. If you choose this option, you'll need to reseat all guests from the beginning.