Table Chart: Seating Your Guests
Written By Edith Henry
Last updated 4 months ago
Assigning Guests to Tables
Once you create your initial layout, you’ll be taken to a comprehensive workspace where you can manage your seating while also keep an eye on the layout of your room. Drag your guests from the unassigned list (on the far left) to their respective tables.
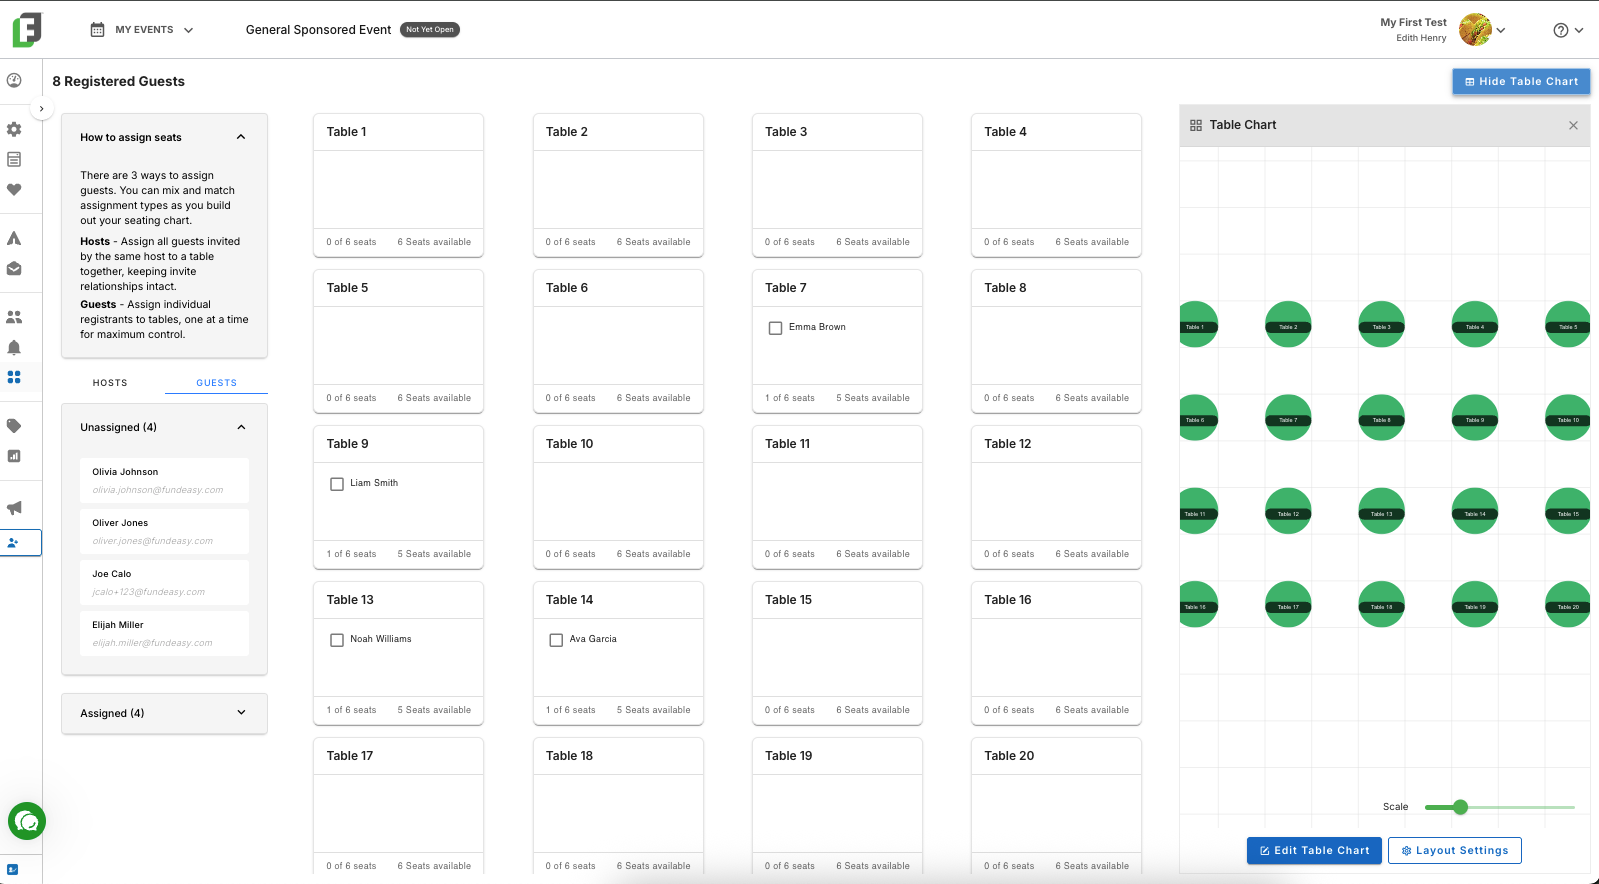
The interface allows quick visibility of assigned remaining unassigned capacity for each table. Users can continue dragging and dropping guests onto the cards until all guests are assigned. If needed, users can also relocate assigned individuals to a different table seamlessly.
Assigning Groups of Hosts
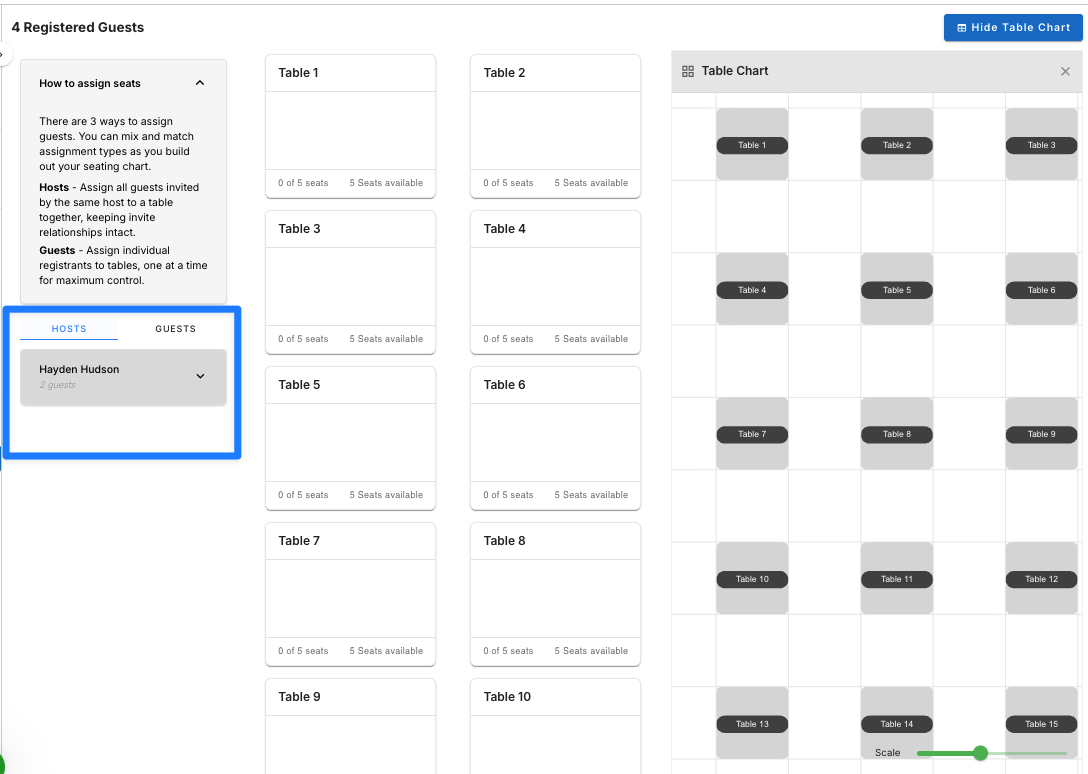
To save you time and to keep groups of hosts together, you can drag and drop the host’s name to seat all the host’s guests together.
Preventing Conflicts When Guests Were Already Assigned
If a host group is being assigned to a table but guests within that group already have a seating assignment, the dashboard will display a Guest assignment conflict modal for the admin to make an explicit choice.
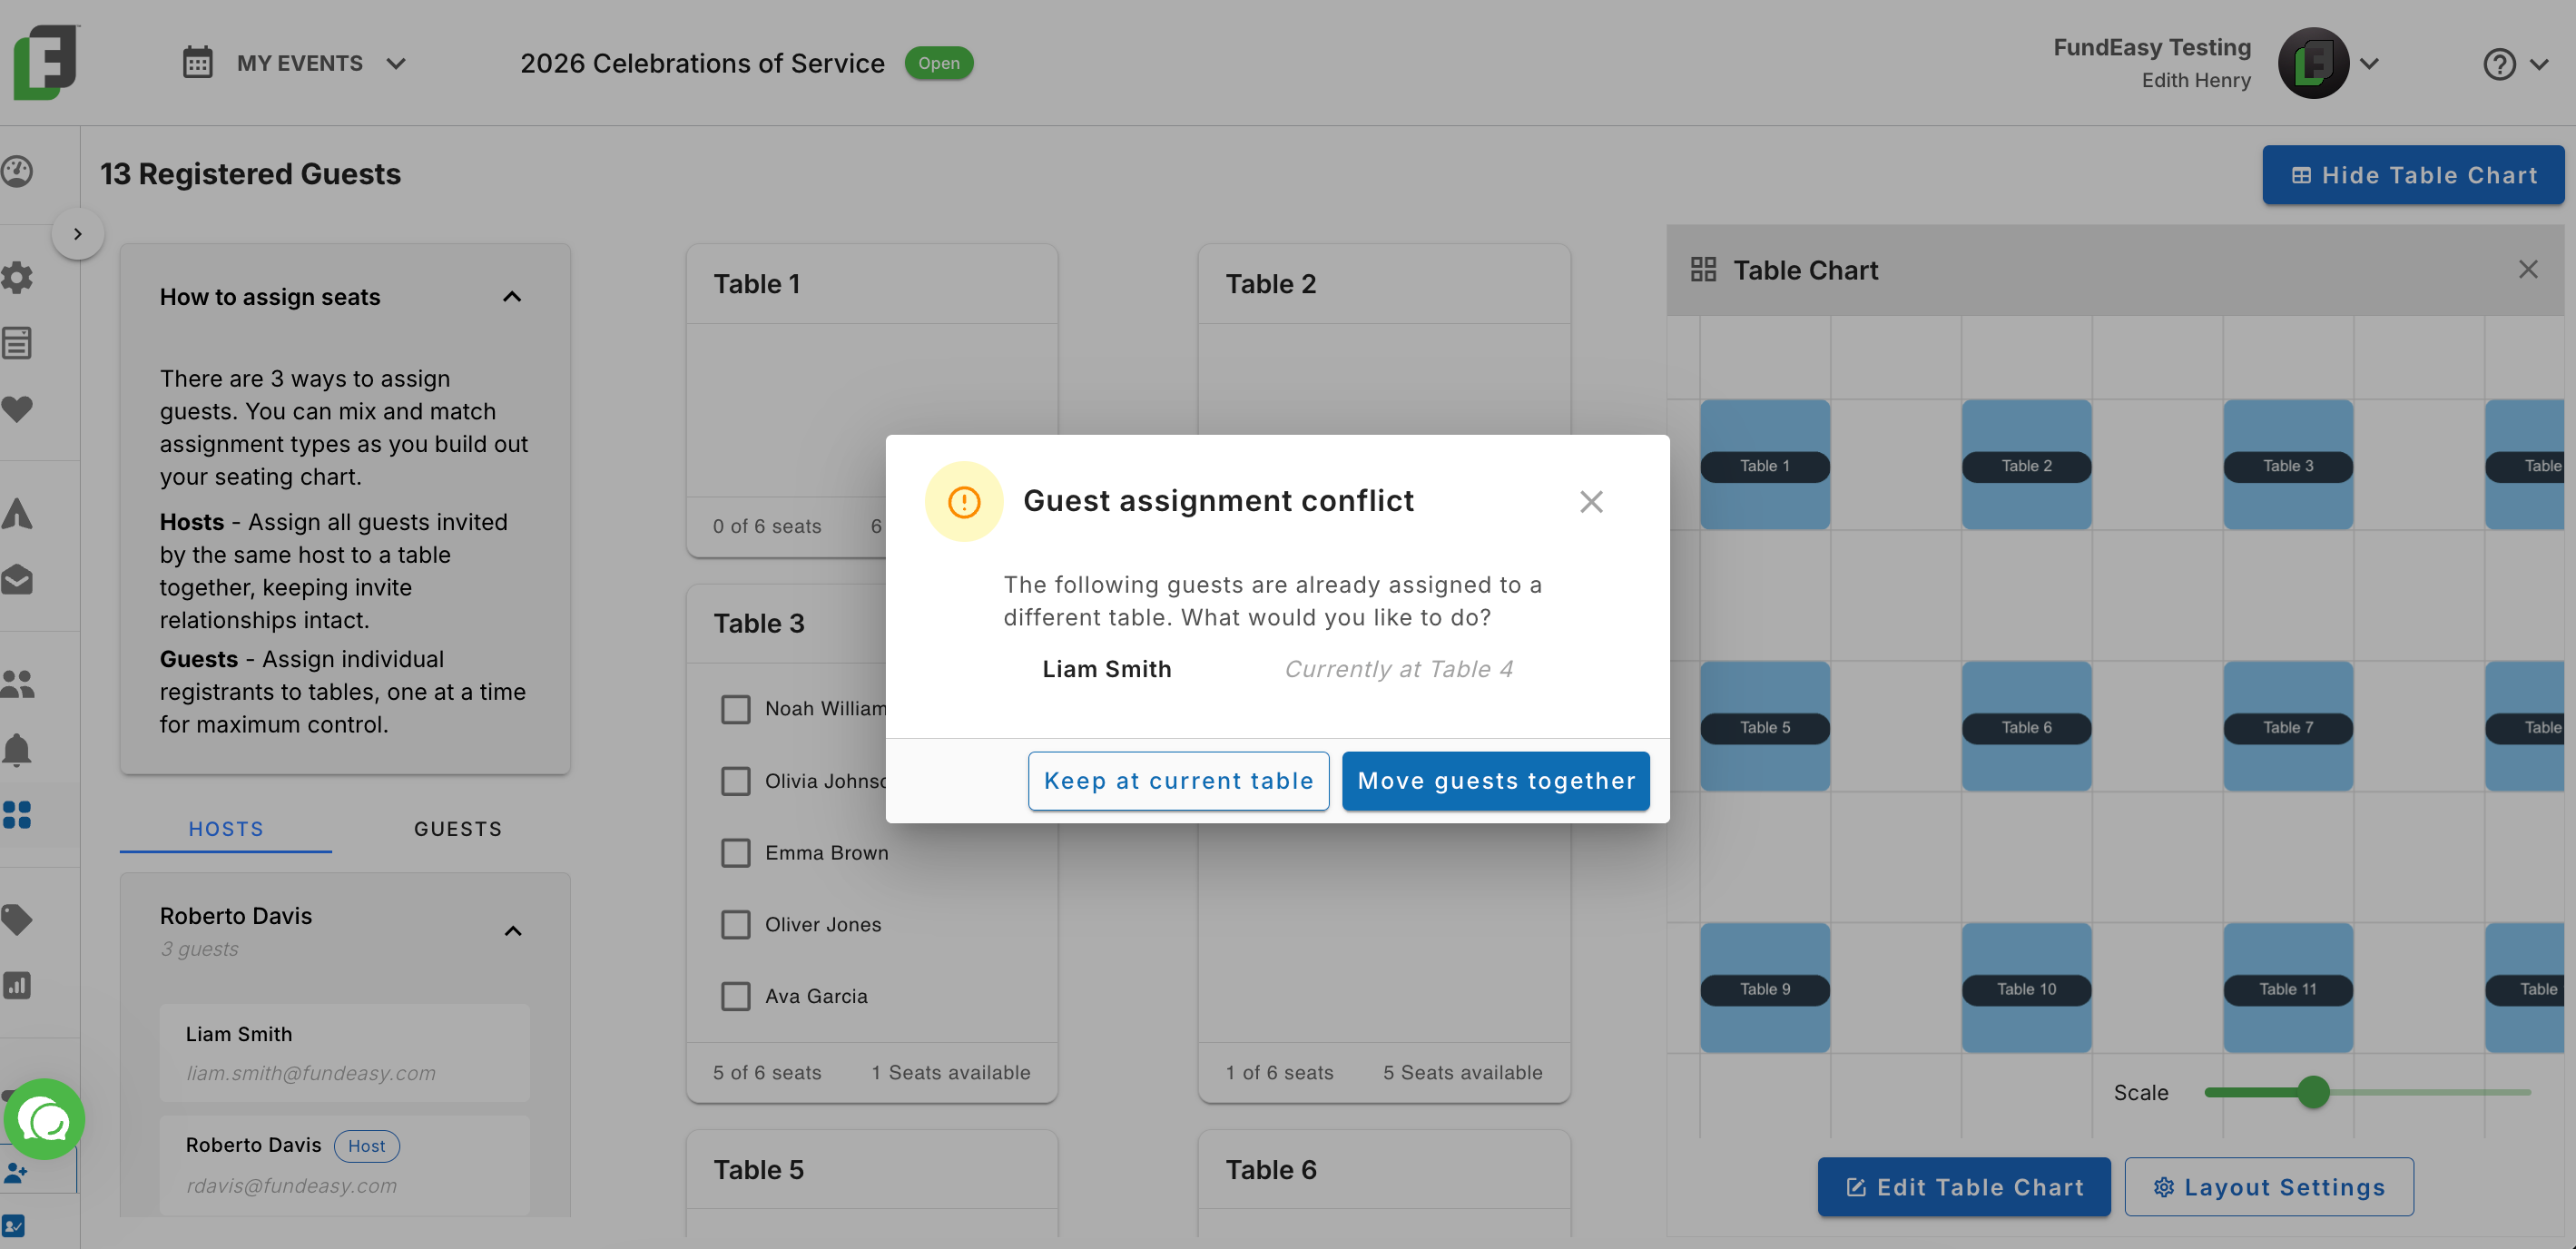
Opting to “Keep at current table” will cancel the action, and “Move guests together” will reassign guests at another table to the new table with the rest of the group.
Managing Groups Too Large for a Single Table
if a host group is being assigned to a table but there is not enough seat capacity for the whole group, the system will display the Insufficient seating available modal. The admin will be shown the names of all guests within the group, allowing the admin to explicitly choose which guests in the host group to seat at the table.
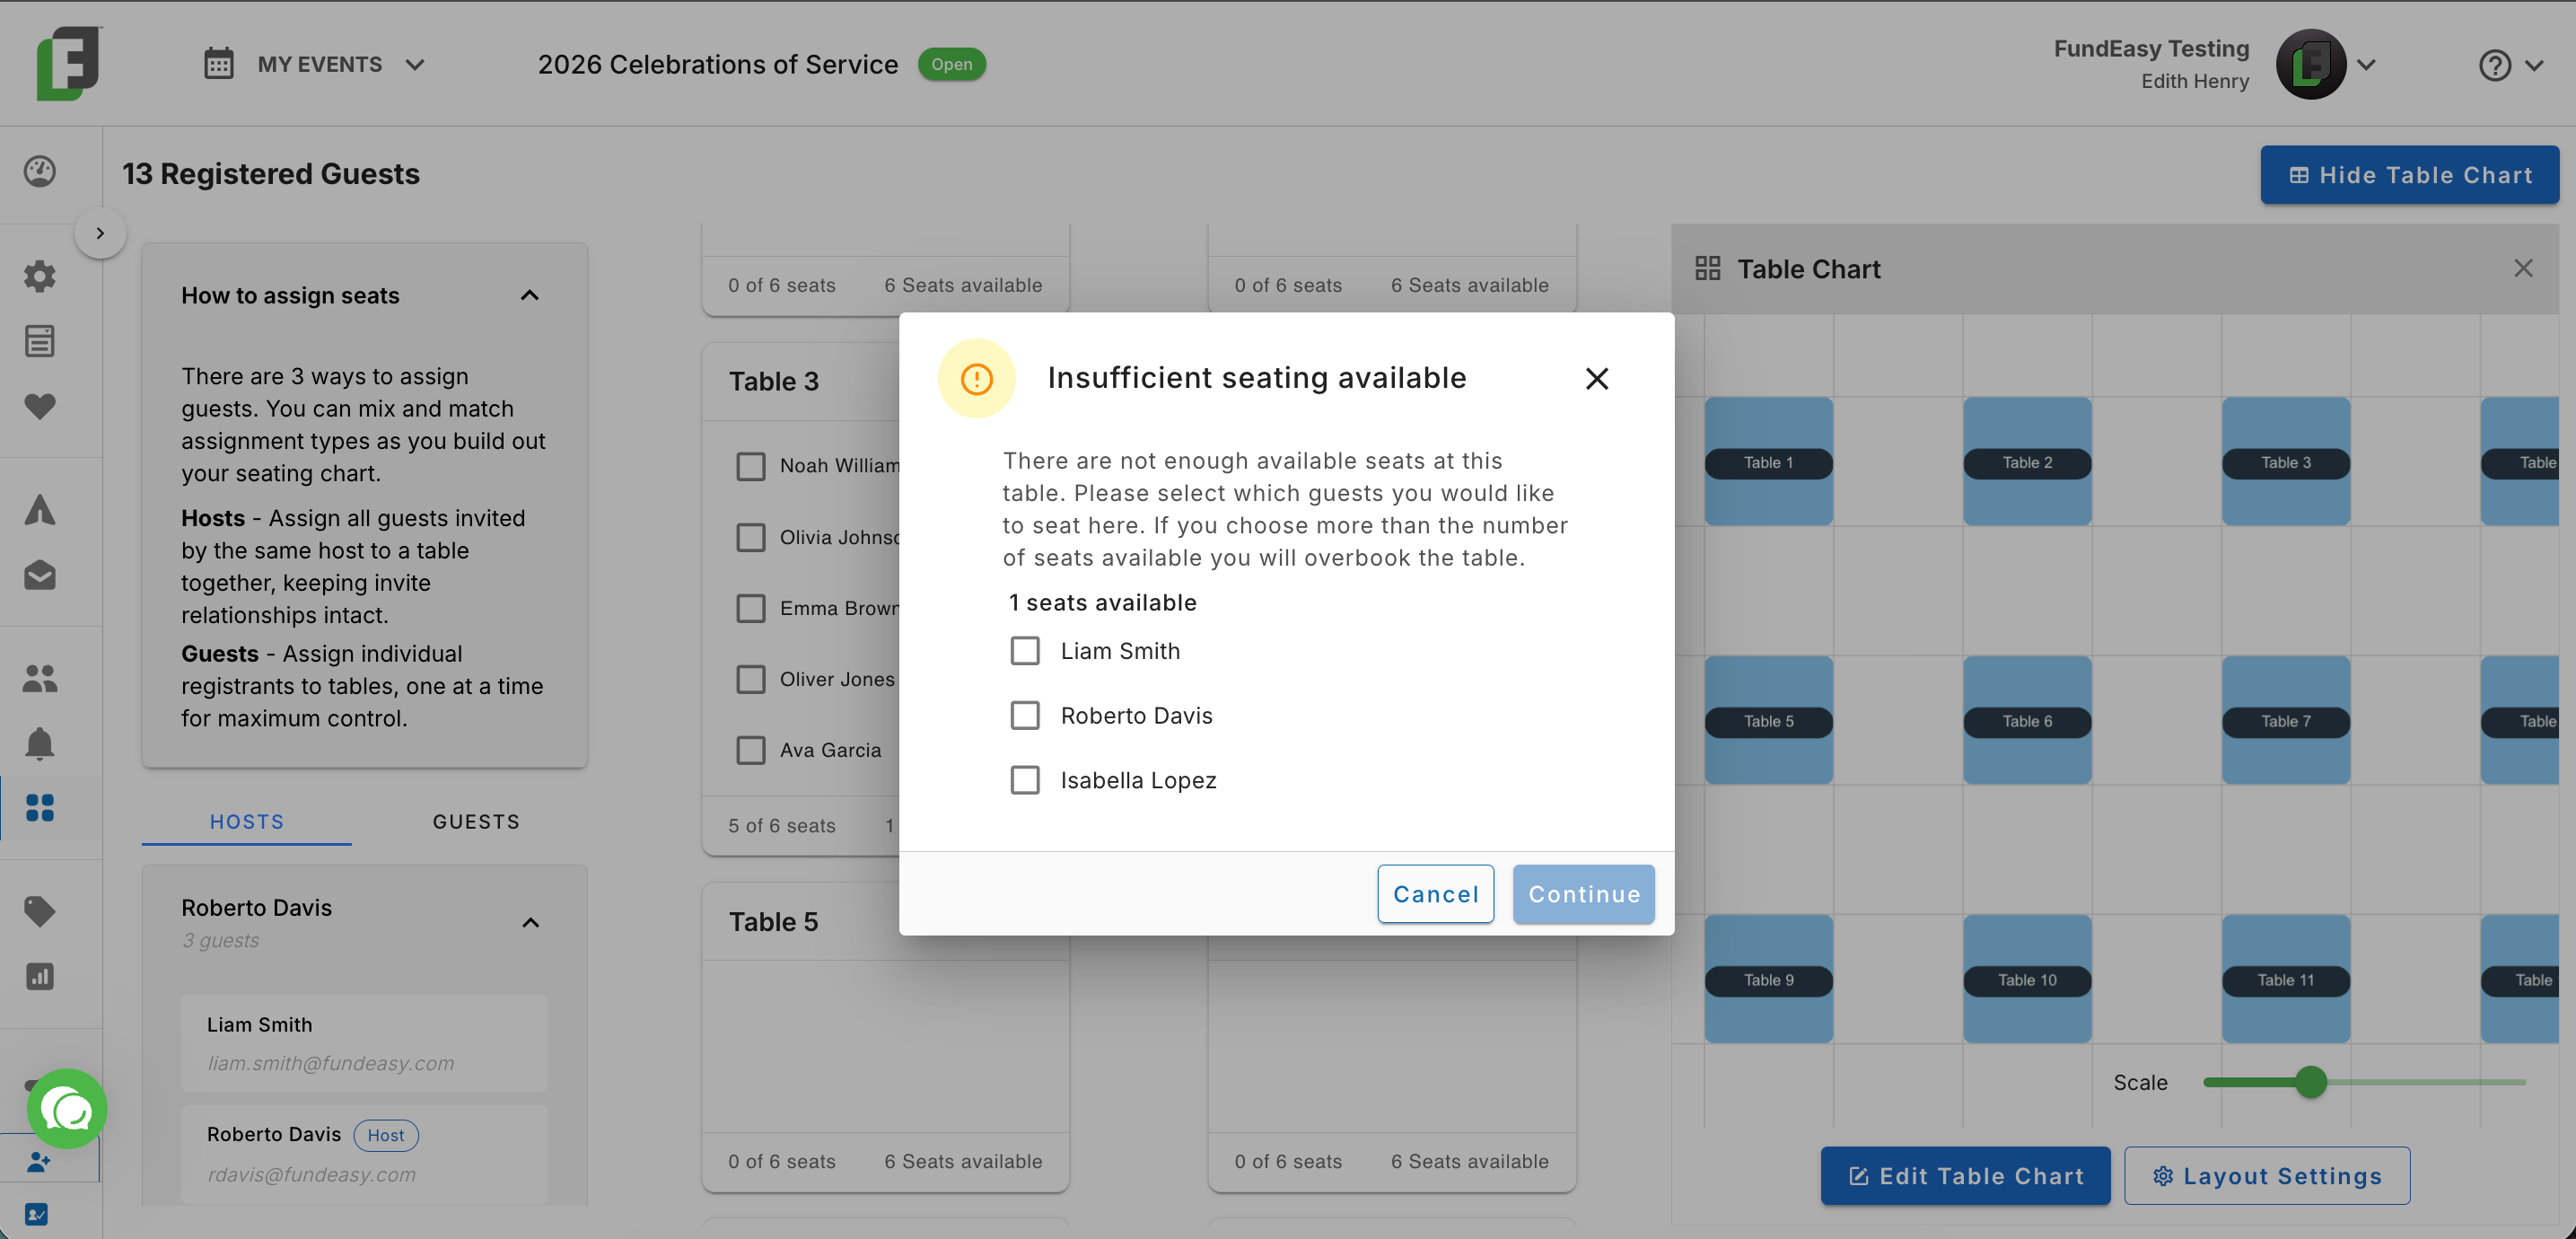
If the admin chooses more than the number of seats available, the system will display the table card with the overbooked status.