The Guest List Tool in Bundle Registration Events (Host Resource)
Written By Edith Henry
Last updated 6 days ago
Thank you for being a host for this event! This guide will walk you through how to access your guest list, understand your reservation, and complete your remaining guest details.
Accessing Your Guest List Manager
After registering as a host, you’ll receive two emails. One is your standard guest confirmation, and the second will be a host-specific message with a subject like “Thank you for registering as a host.”
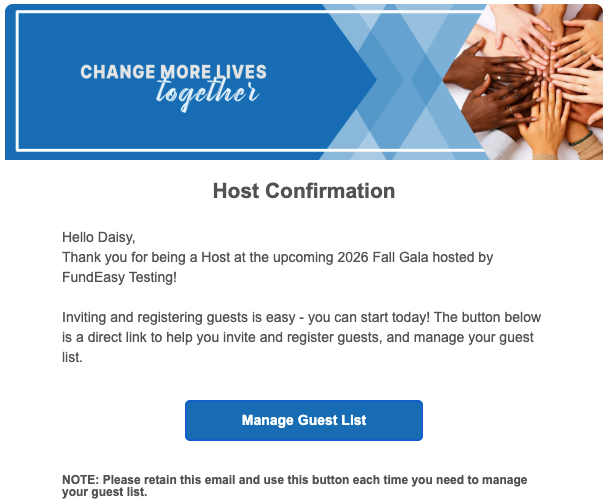
Inside that email, you’ll find a button labeled Manage Guest List. This link opens your Guest Management Tool, where you’ll complete and manage your guest list.
If you ever lose access to the link, your event coordinator can resend it to you.
Understanding Your Reservation
Once inside the tool, you’ll see a breakdown of your reservation.
This includes:
The total number of seats you reserved (paid or complimentary)
Your own completed registration as the host
Any remaining guest slots that still need information
For example, if your reservation includes 15 seats, you’ll see one already completed for you and 14 remaining seats ready to be assigned to guests.
Completing Your Guest List
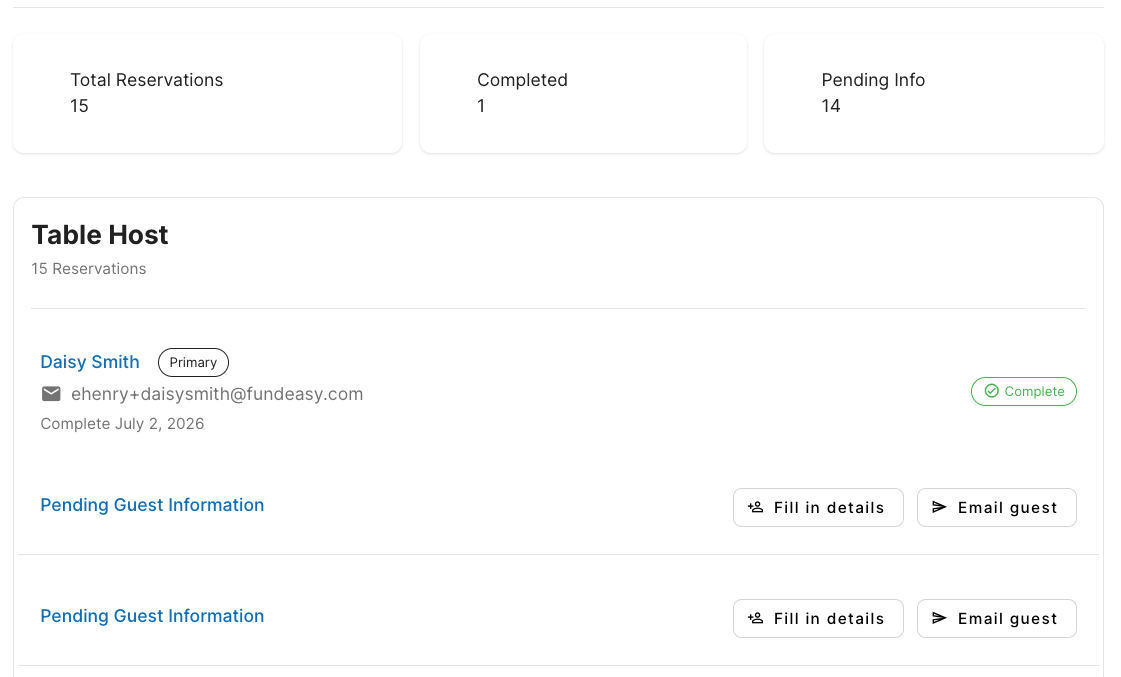
From here, you can complete your guest list in whichever way is easiest for you.
If you already know your guests’ details, you can enter them directly into the form. This is the fastest option for adding names and basic information.
If you prefer, you can also send guests a secure link to complete their own details. Using the Email Guest option, you’ll enter their name and email address, and they’ll receive a message prompting them to fill out their information. This does not create a new reservation—your reservation already holds their seat. It simply allows your guest to complete personal details such as meal selections or any custom fields included in the form.
Before sending, you can preview the email to see exactly what your guest will receive, and you can include a personal message as well.
Updating Your Guest List
Plans change, and the Guest List Manager accounts for that!
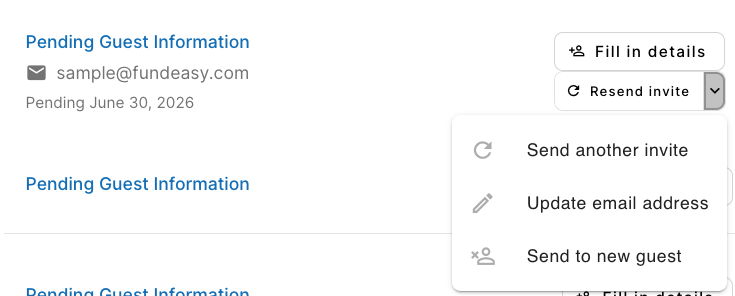
If you sent an invitation but circumstances change, you can resend the invite, update the email address, or redirect the seat to a different guest entirely.
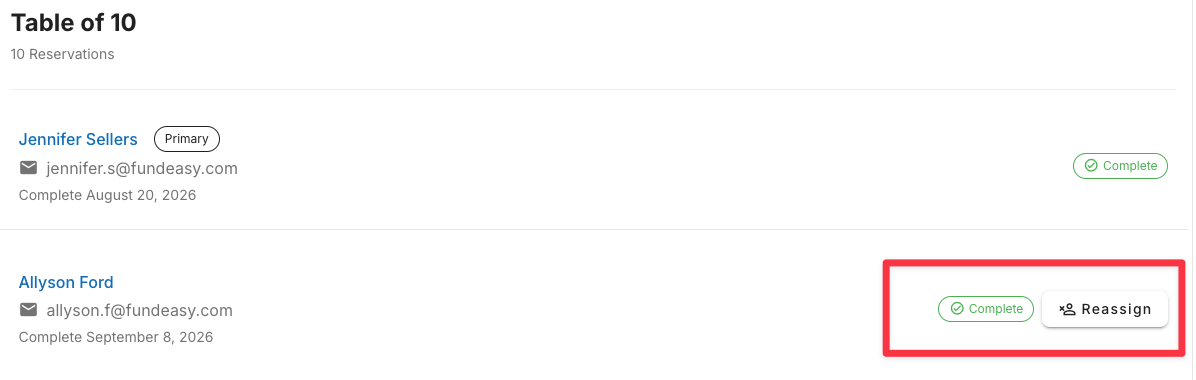
Similarly, if one of your invited guests previously confirmed with you, but now cannot attend, you can easily reassign that seat to someone else. Clicking “Reassign” removes the existing guest details and frees the seat to be filled again by someone else.
As you clarify plans closer to the event date, you can always keep the details organized in your Guest List to help you remember who is coming with you.
Returning to Your Guest List
You can return to this tool at any time to continue updating your guest list.
Everything you enter is saved, so you can complete it in stages as needed.
Closing Note
Thank you again for hosting! We appreciate your help in making this event a success!